Written Multiple-Choice Exams with R/exams
Create exam
The first step in conducting a written exam with multiple-choice
(and/or single-choice) exercises in R/exams' NOPS format is to create the exam in PDF format.
First, we load the R exams package and then simply create a list of exercise file names.

library("exams")
myexam <- list(
  "tstat2.Rnw",
  "ttest.Rnw",
  "relfreq.Rnw",
  "anova.Rnw",
  c("boxplots.Rnw", "scatterplot.Rnw"),
  "cholesky.Rnw"
)
Here, we use a number of schoice and mchoice questions that are directly shipped
within the package. In practice, you would use files that you have authored and stored
somewhere locally. Above, exercises in .Rnw format are used but all of the examples
are also available in .Rmd format, leading to virtually identical output.
Then, we create a small exam with only n = 2 randomly-drawn versions, storing the
resulting PDF files (plus metainformation) on the disk in a new output directory nops_pdf.
To customize the exam we assign a different number of points to the different exercises
and also show the respective number of points at the beginning of each question.
set.seed(403)
ex1 <- exams2nops(myexam, n = 2,
  dir = "nops_pdf", name = "demo", date = "2015-07-29",
  points = c(1, 1, 1, 2, 2, 3), showpoints = TRUE)
A random seed is set to make the generated exams exactly reproducible for you (or ourselves at some point in the future). The output directory now contains three files that were generated.
dir("nops_pdf")## [1] "demo.rds" "demo1.pdf" "demo2.pdf"
The two PDF files are the two exams we requested above.
Furthermore, the metainfromation about the exam (exam IDs, questions, correct and wrong
answer alternatives) is stored in a demo.rds file (serialized R data). This crucial
for being able to evaluate the exam later on.
Print PDF files
- A small number of exams can easily be printed on a standard printer. Otherwise simply use a print shop.
- It is recommended not to scale the printout (i.e., without "Fit to printable area") and to staple the exams in the top-left corner.
- By default the PDFs from
exams2nops()have a blank second page for duplex printing (without content on the back of the exam sheet). For non-duplex printing simply setduplex = FALSEwhen creating the PDFs withexams2nops().

Conduct exam
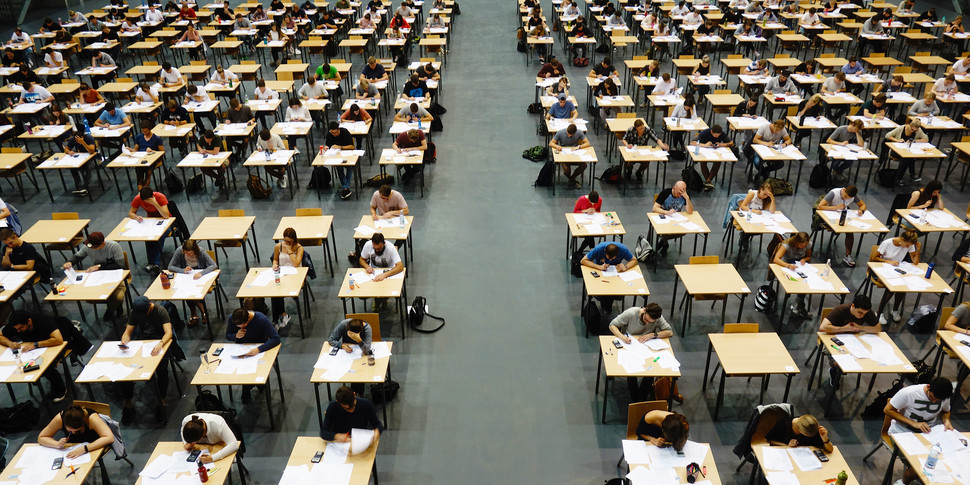
The exam is conducted as usual. But if you used the possibilities of dynamic exercises in R/exams, the risk of cheating is greatly reduced. At the end of the exam you just need to collect the completed exam sheet (first page). Of course, you can also collect the rest of the exam papers (e.g., to keep future students from seeing the exercises). However, an advantage of letting the students keep their exercises reduces the need of having post-exam reviews etc.

Scan results
Each completed exam sheet has information on the exam ID, student ID, and the
checked answers. This needs to be scanned into images (PDF or PNG) and can then
be processed by nops_scan().
Typically, it's easy to use the photocopiers provided by your university to scan
all sheets into PDF or PNG files. For example, our university provides us with
Canon ImageRunners and the sheet feeder can easily take about 40-50 sheets and
render them into a single PDF file.

Practical recommendations:
- The scanned images become smaller in size if the images are read in just black/white (or grayscale). This may sometimes even facilitate extracting the information (see below).
- If the exams were stapled in the top-left corner (see above) the sheet feeder often
works better if the sheets are rotated by 180 degrees (so that the damaged corner
is not fed first into the machine). This often improves the scanning results
considerably and can be accomodated by setting
rotate = TRUEinnops_scan()below.
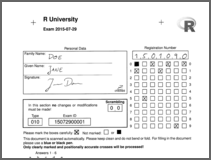
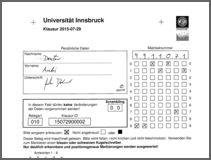
For demonstration, we use two completed demo sheets that are provided along with
the exams package and copy them to a dedicated directory nops_scan.
img <- dir(system.file("nops", package = "exams"), pattern = "nops_scan",
  full.names = TRUE)
dir.create("nops_scan")
file.copy(img, to = "nops_scan")
(Note that the first scanned image corresponds to one of the PDFs above while the other one was generated with custom title/logo/language/etc.)
Using the function nops_scan() we can now read all scanned images (i.e.,
all locally available PNG and/or PDF files) and collect everything in a ZIP file.
Note that if there were PDF files that need to be scanned, then the
R packages qpdf and magick are needed for the conversion to PNG
(or the command line tools pdftk and convert).
nops_scan(dir = "nops_scan")dir("nops_scan")## [1] "nops_scan_20170810004404.zip" "nops_scan1.png"
## [3] "nops_scan2.png"
The resulting file nops_scan_20170810004404.zip contains copies of the
PNG files along with a file called Daten.txt (for historical reasons) that
contains the scanned information in machine-readable from.
See ?nops_scan for more details, e.g., multicore support or options for
rotating PDF files prior to scanning. Moreover for quality control and for
correcting problems that occurred during scanning (e.g., due rotated or poorly
filled-in exam sheets) the function nops_fix is provided.
Evaluate results
In the previous scanning step the exam sheets have just been read but not
yet evaluated, i.e., it has not yet been assessed which questions were answered
(partially) correctly and which were wrong, and no points have been assigned.
Therefore, we use nops_eval() to carry out these computations and to make
the results available - both in a format easy to read for machines (a CSV file)
and a format for humans (one HTML page for each student).

To do so, three files are required:
- An RDS file with the exam meta-information, generated by
exams2nops()above. - A ZIP file with the scanned sheets, generated by
nops_scan()above. - A CSV file (semicolon-separated values) with the student infomation (registration number, name, and some ID or username). In practice, this CSV file will typically be processed from some registration service or learning management system etc. However, here we simply create a suitable CSV file on the fly.
write.table(data.frame(
  registration = c("1501090", "9901071"),
  name = c("Jane Doe", "Ambi Dexter"),
  id = c("jane_doe", "ambi_dexter")
), file = "Exam-2015-07-29.csv", sep = ";", quote = FALSE, row.names = FALSE)
The resulting file is Exam-2015-07-29.csv.
Now the exam can be evaluated creating an output data frame (also stored as a CSV file) and individual HTML reports (stored in a ZIP file). Here, we employ an evaluation scheme without partial points in the multiple-choice questions and differing points across questions.
ev1 <- nops_eval(
  register = "Exam-2015-07-29.csv",
  solutions = "nops_pdf/demo.rds",
  scans = Sys.glob("nops_scan/nops_scan_*.zip"),
  eval = exams_eval(partial = FALSE, negative = FALSE),
  interactive = FALSE
)
dir()
## [1] "Exam-2015-07-29.csv" "nops_eval.csv" "nops_eval.zip"
## [4] "nops_pdf" "nops_scan"
The evaluated data can be inspected by opening nops_eval.csv in some spreadsheet software or we can directly look at the data in R. Based on this information, the marks could be entered into the university’s information system.
ev1## registration name id exam scrambling
## 1501090 1501090 Jane Doe jane_doe 15072900001 00
## 9901071 9901071 Ambi Dexter ambi_dexter 15072900002 00
## scan points mark answer.1 solution.1 check.1 points.1
## 1501090 nops_scan1.png 4 5 00100 00100 1 1
## 9901071 nops_scan2.png 0 5 10100 10000 0 0
## answer.2 solution.2 check.2 points.2 answer.3 solution.3 check.3
## 1501090 11101 11100 0 0 00000 00000 1
## 9901071 10111 11001 0 0 01000 01010 0
## points.3 answer.4 solution.4 check.4 points.4 answer.5 solution.5
## 1501090 1 00100 00110 0 0 00010 00010
## 9901071 0 00000 01011 0 0 00000 11010
## check.5 points.5 answer.6 solution.6 check.6 points.6
## 1501090 1 2 01101 01111 0 0
## 9901071 0 0 11100 00011 0 0
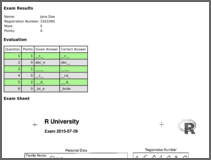
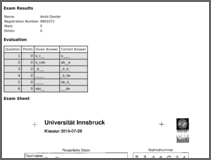
And nops_eval.zip contains subdirectories with HTML reports for each of the two participants.
These HTML reports could then be uploaded into a learning management system, put on some other web server, or even sent out via e-mail.


